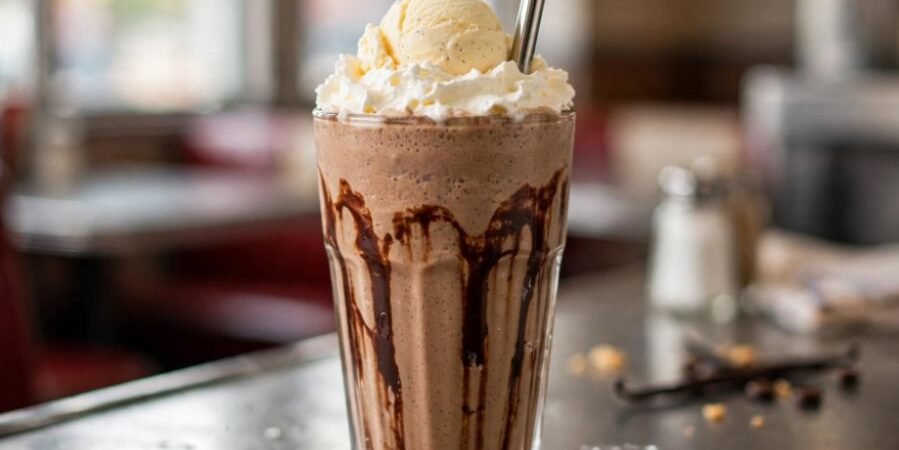
Most homemade coffee shakes collapse into watery coffee milk within three minutes of leaving the blender. A genuine coffee milkshake with vanilla ice cream recipe must deliver a dense, spoonable texture with a deep roasted coffee bite that cuts through heavy dairy fat.
After testing dozens of variations in my own kitchen, I discovered that thick milkshake architecture comes down to managing motor heat, fluid ounces, and coffee concentration.
The Physics of an Ultra-Thick Coffee Shake
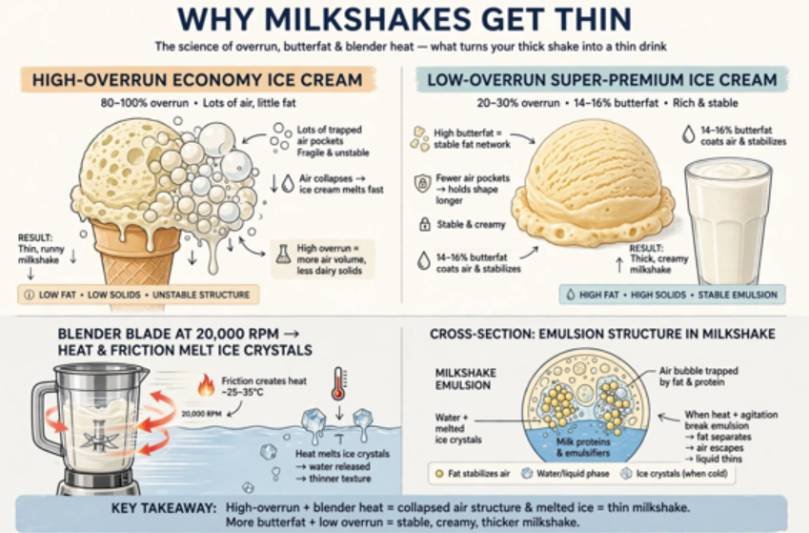
A great coffee milkshake balances three components: cold dairy fat, suspended solids, and concentrated coffee extract. When these elements emulsify properly, tiny air pockets remain trapped in suspension, yielding that velvety, soda-fountain draw through a wide straw.
Managing Ice Cream Overrun and Butterfat
The ice cream you scoop dictates your final viscosity. Commercial economy tubs often contain up to 50% “overrun,” which is the culinary term for air pumped into the base during churning, according to food science breakdowns on Serious Eats. When you blend high-overrun ice cream, those micro-bubbles collapse immediately into thin liquid.
For this recipe, choose a super-premium or premium vanilla ice cream with 14% to 16% butterfat content and low overrun. The USDA FoodData Central database confirms that higher butterfat yields greater caloric density and dairy solids per gram, creating an emulsion that holds up against acidic coffee compounds. French vanilla works well because the egg yolk base adds lecithin, a natural emulsifier that prevents early separation.
The Blade Friction Mistake
Blender blades spin at 10,000 to 20,000 RPM. This kinetic energy transfers directly into the ingredients as thermal energy.
Running your blender for 60 seconds generates enough localized heat to melt delicate ice crystals into room-temperature cream. Pulse the mixture in short 5-second bursts, or blend on high for no longer than 18 to 22 seconds total. Your blender’s job is simply to fold the ice cream into the milk and coffee—not puree it into oblivion.
Three Coffee Extraction Paths Compared
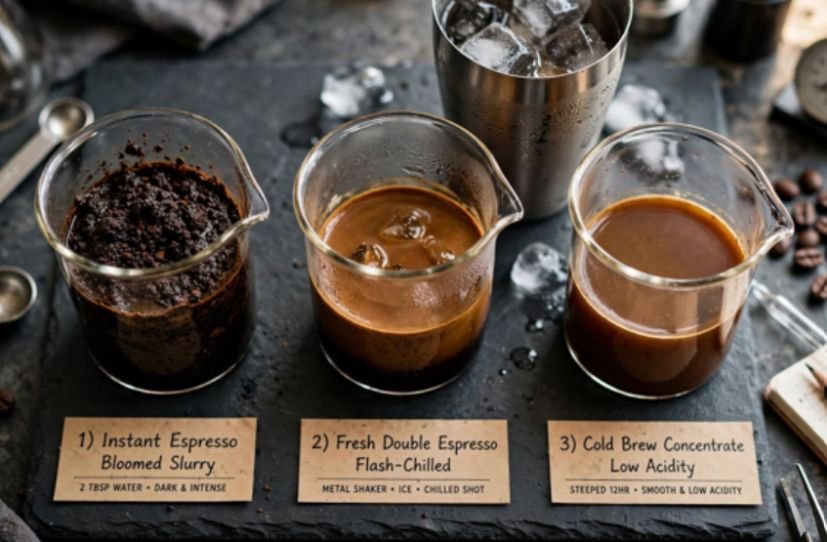
The form of coffee you introduce determines your total water volume.
This kind of ingredient and preparation comparison also appears in how to make diner style cherry phosphate, where syrup, acid phosphate, and seltzer must be balanced carefully for the right fountain-style finish.
Adding standard drip coffee introduces excessive water, instantly diluting the milkshake base.
COFFEE BASES FOR BLENDING
┌──────────────────────┬──────────────────────┬──────────────────────┐
│ Instant Espresso │ Fresh Espresso │ Cold Brew Concentrate│
├──────────────────────┼──────────────────────┼──────────────────────┤
│ Water: 2 to 4 tbsp │ Water: ~4 oz total │ Water: Zero extra │
│ Temp: Warm-dissolved │ Temp: Flash-chilled │ Temp: Fridge-cold │
│ Profile: Sharp roast │ Profile: Rich crema │ Profile: Low acidity │
└──────────────────────┴──────────────────────┴──────────────────────┘
Method 1: The Quick-Bloomed Instant Espresso Base
Instant espresso powder delivers maximum coffee punch with almost zero added fluid. Dissolve 1½ tablespoons of dark roast granules into 2 tablespoons of warm tap water. This creates an intense coffee slurry that disperses cleanly throughout the ice cream without leaving gritty crystals. This method is the home kitchen gold standard for speed and texture control.
Method 2: Flash-Chilled Fresh Espresso
Freshly pulled espresso yields complex aromatic notes and rich crema that standard instant coffee cannot match. However, pouring hot espresso into cold ice cream ruins the milkshake instantly.
Pull two double shots (about 4 ounces total) according to Specialty Coffee Association (SCA) extraction parameters. Dissolve your granulated sugar directly into the hot liquid while it is hot.
Transfer the shots into a pre-chilled metal shaker with two large cocktail ice cubes, shake vigorously for eight seconds, strain immediately, and discard the ice. You capture the complex roasted crema without thinning the dairy.
Method 3: Toddy-Style Cold Brew Concentrate
Cold brew concentrate brewed at a 1:4 coffee-to-water ratio offers low perceived acidity and natural cocoa sweetness. Because it sits chilled in the refrigerator, it introduces zero heat into the pitcher. Measure out 4 fluid ounces of pure concentrate. When using cold brew, reduce your added milk by half to offset the additional liquid volume.
Tested Ingredient Ratios for Two Tall Servings
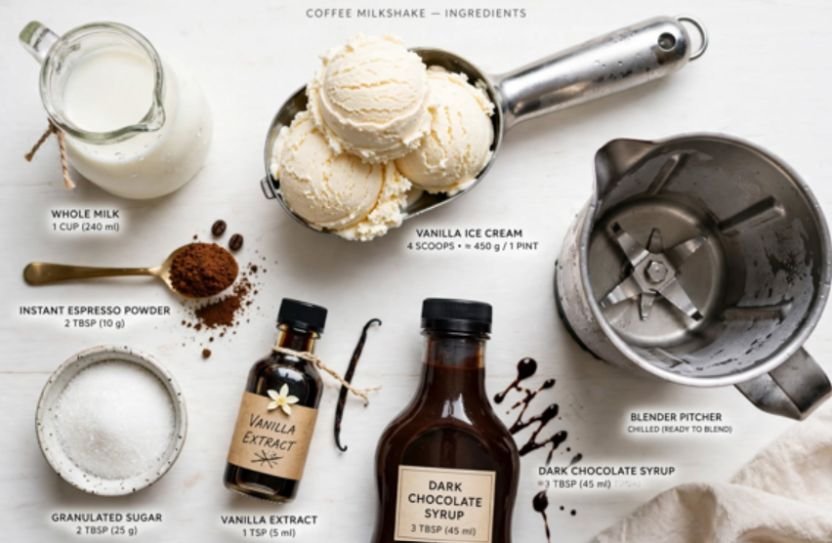
Use chilled tools. Placing your blender pitcher and soda glasses in the freezer for 20 minutes keeps the dairy stiff during assembly.
- Super-Premium Vanilla Ice Cream: 4 large, dense scoops (approximately 14 oz / 400 g)
- Whole Milk (Cold, minimum 3.25% fat): 1 cup (240 ml)
- Coffee Element: 1½ tbsp instant espresso bloomed in 2 tbsp water OR 4 oz flash-chilled espresso OR 4 oz cold brew concentrate
- Granulated White Sugar: 2 tablespoons (omit if using sweetened cold brew)
- Pure Vanilla Extract: ½ teaspoon (enhances the ice cream’s bourbon vanilla profile, as noted in baking resources like King Arthur Baking)
- Finishing Garnish (Optional): Dark chocolate syrup, sweetened whipped cream, fresh coffee grounds
Step-by-Step Technique: Blending Without Melting
- Chill the Hardware: Rest your blender pitcher and glasses in the freezer at 0°F (-18°C) for at least 15 minutes before prep.
- Layer Liquids First: Pour the milk, bloomed coffee mixture, sugar, and vanilla extract into the base of the pitcher. Adding liquids beneath the ice cream allows the blades to grab and create a vortex without stalling.
- Add the Ice Cream: Pack your 4 scoops of cold vanilla ice cream directly over the liquid base.
- The Pulse Cycle: Pulse three times at 2-second intervals to break down the ice cream masses. Switch to high speed for exactly 15 seconds. Stop the motor.
- Inspect the Vortex: Remove the lid and inspect the texture with a metal spoon. If large frozen pockets remain, pulse twice more. The mixture should form a heavy, rippling ribbon when lifted.
- Pour and Serve: Tilt your chilled tall glasses at a 45-degree angle. Drizzle chocolate syrup along the inside walls if desired, mimicking the style of a classic diner style egg cream. Pour the thick milkshake, top with an extra small scoop of ice cream, and serve with an 8mm wide straw.
Troubleshooting Thin Shakes and Separated Emulsions
| Problem | Root Cause | Immediate Fix |
| Shake is runny/drinkable like milk | High liquid volume or motor friction run past 30 seconds. | Add 1 full scoop of ice cream and 1 tbsp of milk powder; pulse twice. |
| Gritty texture throughout | Instant coffee stirred directly into ice-cold milk without blooming. | Dissolve granules in 1 tbsp hot water before pouring into the pitcher. |
| Bitter, astringent finish | Over-extracted espresso beans or dark instant roasts. | Whisk in 1 tsp pure maple syrup or sweetened condensed milk to balance pH. |
| Ice cream floats to top / separates | Low-fat milk (skim/1%) unable to hold an emulsion with high butterfat. | Always match high-fat cream with minimum 3.25% whole milk or half-and-half. |
Creative Riffs and Cafe Variations
Once you dial in the core ratios, adjust the flavor accents to build specialty cafe beverages:
- Dark Mocha Fudge: Add 2 tablespoons of Dutch-process cocoa powder to the blender with your bloomed coffee. The unsweetened cocoa deepens the roast profile without adding cloying sugar.
- Salted Caramel Affogato Shake: Line your glass with salted dulce de leche, add a pinch of flaky Maldon sea salt into the blender, and float a shot of chilled espresso directly on top of the finished pour.
- Cardamom & Brown Sugar: Swap white sugar for dark brown muscovado sugar and add ¼ teaspoon of freshly ground green cardamom for an aromatic Middle Eastern profile.
Keep Your Straw Upright: The Final Word
A great coffee milkshake should never collapse under the weight of its own straw. Keep your liquid volumes measured, bloom your dry coffee extracts, and cut your blender motor before friction takes over. Toss your blender cup in the freezer right now, grab a pint of high-butterfat vanilla, and build an authentic diner shake at home.
If you know how to build an old fashioned diner malted milkshake, you understand that ice cubes have no place in a real shake. True diner body relies entirely on temperature discipline and high-solids ice cream.
Frequently Asked Questions
1. Can I use brewed drip coffee for this recipe?
Standard drip coffee contains too much water, which thins out the shake unless you reduce it on the stove into a syrup first.
2. Why is my coffee milkshake melting so fast?
Your blender ran too long, or the liquid coffee was added warm, breaking the ice cream’s frozen fat matrix.
3. What is the best milk-to-ice-cream ratio for thick milkshakes?
Use four parts ice cream to one part milk by volume (for example, two cups of ice cream to one-half cup of whole milk).
4. Can I make this coffee milkshake dairy-free?
Use full-fat oat milk paired with a coconut cream or cashew-based vanilla frozen dessert to maintain structural thickness.